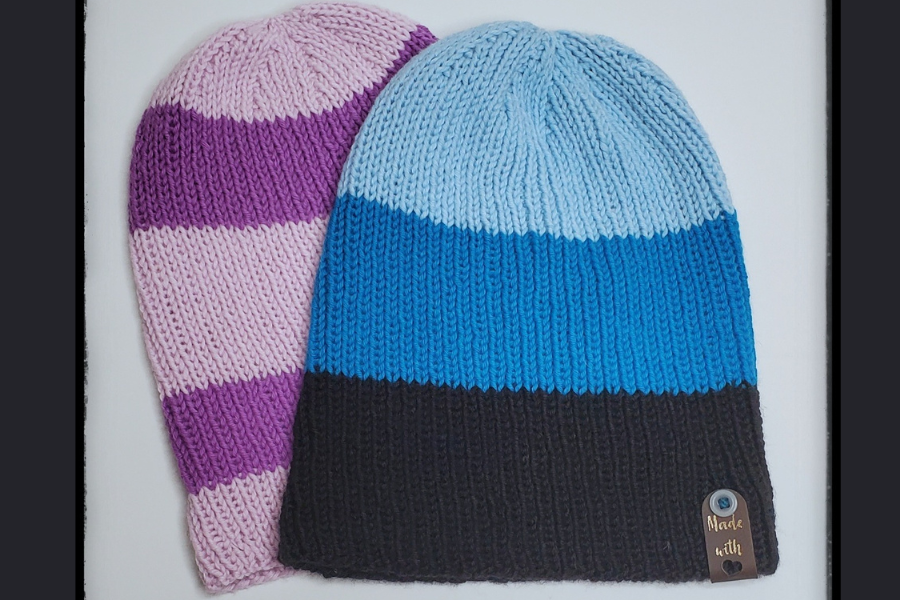
Basic Bitch Beanie
As I continue on my design journey.
I wanted to have a series of beginner patterns in my arsenal to offer newbies something relatively easy to practice their newly learned knitting skills with.
These patterns, of course, will not be exclusively for newbies but for everyone.
I know there have been many times in my life where I needed a quick gift, or just something super easy as a palette cleanser between bigger projects.
Insert the Basic Bitch beanie.

Combine a simple K1, P1 body with a small twist on the crown to keep in pattern and you have a lovely little cap.

You may be wondering how I came up with the name… or maybe you aren’t but I'm gonna tell you anyways!
When I finished it and put it on the first thought that ran through my head was….bitch you cute but you basic.
And there you have it.
Tools
-US 6 interchangeable needles with 8 inch cord
-DPN or longer cable to use magic loop
-11 stitch markers with 1 unique to mark BOR
-scissors/tapestry needle
-1 skein DK weight yarn.
Fuzzywhatknots Fuzzy DK 100% super wash wool 231 yards
Skill level: Beginner
Glossary
K = knit
P = purl
P2TOG = purl 2 together
K2TOG = knit 2 together
BOR = beginning of round
DEC = decrease
Gauge = 16S x 32R K1, P1 unblocked and unstretched = 4”
Size fits teen/adult head
Directions
Cast on 120+1 using long tail cast on or preferred method of casting on. To join in the round slip last stitch on the left hand needle to the right hand needle, take the second stitch now on the right hand needle and pull over the slipped stitch and drop off. Pull to tighten. Place a unique stitch marker to denote BOR.
K1, P1 until your hat measures 8’” from cast on edge. (For a slouchier fit or for a folded over brim add 2 to 4 inches here. Please note this will add to yardage required)
Crown decreases
K1, P1 placing a stitch marker every 12 stitches (switch to magic loop or DPN when needed to complete crown decreases)
DEC 1 - *K1, P1 to last 2 stitches before marker, P2TOG* rep ** to end of round (110)
DEC 2 - *K1, P1 to last 2 stitches before marker, P2TOG* rep ** to end of round (100)
DEC 3 - *K1, P1* rep ** to end of round (100)
DEC 4 - *K1, P1 to last 2 stitches before marker, P2TOG* rep ** to end of round (90)
DEC 5 - *K1, P1 to last 2 stitches before marker, P2TOG* rep ** to end of round (80)
DEC 6 - *K1, P1* rep ** to end of round (80)
DEC 7 - *K1, P1 to last 2 stitches before marker, P2TOG* rep ** to end of round (70)
DEC 8 - *K1, P1 to last 2 stitches before marker, P2TOG* rep ** to end of round (60)
DEC 9 - *K1, P1* rep ** to end of round (60)
DEC 10- *K1, P1 to last 2 stitches before marker, P2TOG* rep ** to end of round (50)
DEC 11- *K1, P1 to last 2 stitches before marker, P2TOG* rep ** to end of round (40)
DEC 12- *K1, P1 to last 2 stitches before marker, P2TOG* rep ** to end of round removing all stitch markers except BOR (30)
DEC 13- K2TOG to end of round (15)
DEC 14- K1, K2TOG to end of round (10)
Cut a long tail and thread a tapestry needle. Slip final 10 stitches onto tapestry needles and pull closed. Weave in your ends, block (if that's your thing) and enjoy!
Don't forget to tag us on Instagram @fuzzywhatknots or Facebook @fuzzywhatknotsfiber so we can see all your beautiful versions!
-Teresa